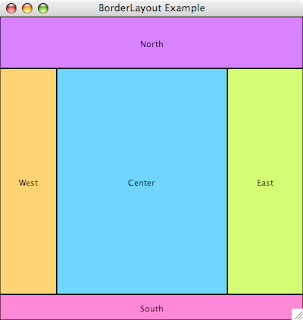
The principle of the BorderLayout is quite simple: it divides the window into 5 panels: North, East, South, West and Center. As a picture says more than a thousand words, here's what this layout generally looks like:

The North panel is a good place to store a toolbar, the South panel usually plays host for a status area, while the West panel may show an outline, and the East panel a property grid, leaving the Center for the actual content.
For this example, I chose the easy route, creating a single rectangle graphic for each panel. I also picked distinct colors so you can more easily see the effect of resizing the window once the pieces of the puzzle fall into place. And it turns out it isn't that much work to implement, as I set the card script to:
on resizeStack pNewWidth, pNewHeight
   local tCenterHeight, tCenterWidth
   --
   lock screen
   -- update the north and south panels
   set the widthFromLeft of graphic "North" to pNewWidth
   set the widthFromLeft of graphic "South" to pNewWidth
   set the bottom of graphic "South" to pNewHeight
   put the top of graphic "South" - \
       the bottom of graphic "North" \
       into tCenterHeight
   -- update the west and east panels
   set the heightFromTop of graphic "West" to \
       tCenterHeight
   set the heightFromTop of graphic "East" to \
       tCenterHeight
   set the right of graphic "East" to pNewWidth
   put the left of graphic "East" - \
       the right of graphic "West" \
       into tCenterWidth
   -- update the center panel
   set the widthFromLeft of graphic "Center" to \
       tCenterWidth
   set the heightFromTop of graphic "Center" to \
       tCenterHeight
   --
   unlock screen
   pass resizeStack
end resizeStack

--> helper property setters

setProp widthFromLeft pNewWidth
   local tRectangle
   --
   lock screen
   put the rectangle of the target into tRectangle
   put item 1 of tRectangle + pNewWidth \
       into item 3 of tRectangle
   set the rectangle of the target to tRectangle
   unlock screen
end widthFromLeft

setProp heightFromTop pNewHeight
   local tRectangle
   --
   lock screen
   put the rectangle of the target into tRectangle
   put item 2 of tRectangle + pNewHeight \
       into item 4 of tRectangle
   set the rectangle of the target to tRectangle
   unlock screen
end heightFromTop
Let's see what is happening here. The script handles the resizeStack event, which has 4 parameters (new width, new height, old width, old height) of which we only use the first two.
As the North and South panels use up the entire width, I can simply set their width to the new width of the stack. However, setting the width of a control in revTalk works from the location of the control (which is the center, not the topleft).
So I use a fake helper property setter 'widthFromLeft' to update the rectangle of the control instead. Finally, we move the South panel to the bottom edge of the window, and calculate the distance between the top of the south panel and the bottom of the north panel, as this is the new height for our West, East and Center panels.
Armed with this information, I follow a similar path for the West and East panels, updating their height using a fake helper property setter 'heightFromTop', and moving the East panel to the right edge of the window, calculating the distance between the east and west panels to determine the new width of the Center panel. And now it is dead-easy to update the Center panel with the calculated width and height.
That's all there is to it! Admittedly, this example merely resizes 5 graphics, but you can extend this logic to groups, handling the resizeControl message in your group scripts to automatically update the layout of the group's contents.
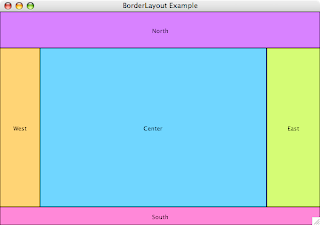
Here's what it looks like when stretched horizontally.

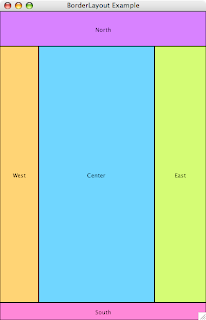
And here's what it looks like when stretched vertically.

Straightforward to implement with very little code. Next time, I'll add some resizers for the West and East panels.
No comments:
Post a Comment